🚚 Free Shipping on All Orders! 🚚
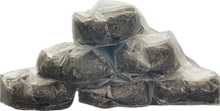
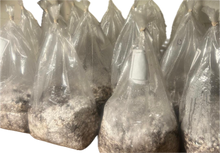
Grow your gourmet mushrooms with ease using our high-quality substrates and simple, step-by-step process. Here’s everything you need to know to get started:
Choose Your Substrate
Pick from our two premium substrate options:
-
aPlusAlpacaRabbit
-
Nutrientless (Coir-Vermiculite-Azomite)
Then, select your preferred bag size (2-pound or 3-pound) and quantity.
Prepare Your Supplies
-
Store Supplies in Advance
-
Purchase or prepare your supplies and store them for 10–14 days to ensure they’re clean and ready for use.
-
-
Maintain a Sterile Workspace
-
Treat your preparation area like a surgical suite—cleanliness is key!
-
Disinfect your workspace with 70% alcohol and wear gloves and a mask during setup.
-
Mixing Spawn and Substrate
-
Measure the Spawn
-
For 2-pound bags: Use ~1 pound (or 1 quart) of fully colonized grain spawn.
-
For 3-pound bags: Use ~1.5 pounds of colonized grain spawn.
-
-
Combine Carefully
-
Mix the spawn and substrate without letting the bags touch to avoid cross-contamination.
-
-
Seal and Wait
-
Seal the bag with a rubber band or impulse sealer.
-
Thoroughly mix the contents, then press down to form an even cake.
-
Let it colonize for 10–14 days—no misting needed during this time.
-
Once the substrate begins to solidify, place a rubber band around the base (outside the bag) to keep it pressed against the bag’s sides and prevent side pins.
-
-
Regulate Moisture (Optional)
-
If excess moisture builds up, increase airflow to manage humidity.
-
If the bag appears too wet or pooling occurs, cut a small 2–3-inch slit below the filter once fully colonized and cover it with micropore tape.
-
Harvest Your Mushrooms
-
Harvest at the Right Time
-
When the veil under the mushroom cap begins to break, open the bag and harvest using a gentle twist-and-pull motion.
-
-
Maintain Optimal Humidity
-
After harvesting, mist the substrate heavily to keep moisture levels ideal for the next flush.
-
-
Prepare for the Second Flush
-
Your substrate is ready for another round of growth! Continue monitoring humidity and mist as needed to support additional flushes.
-
For best results, use your substrate within 30 days of receiving bags.
Bulk Pricing Options
Save big with our tiered bulk pricing:
-
1,000+ lbs: $1.65 per lb
-
2,000+ lbs: $1.60 per lb
-
5,000+ lbs: $1.50 per lb
-
10,000 lbs: $1.30 per lb
Shipping Details
-
Bulk orders are shipped on pallets (approximately 1,300 pounds per pallet).
-
Shipping costs range from $300–$650 depending on your location (not included in price quotes).
-
Contact us for a personalized shipping quote to get the best deal!
By following these steps, you’ll enjoy a clean, efficient, and successful mushroom-growing experience with maximum yields!


