🚚 FREE SHIPPING ON ALL ORDERS! 🚚
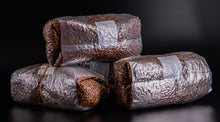
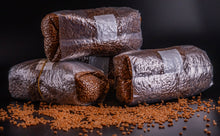
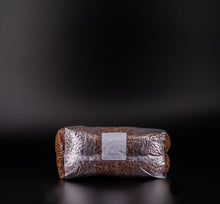
Premium Rye Berry Grain Bags
Check out our quantity options—buy more, save more! Enjoy discounts on bulk purchases and maximize your savings today!
Watch our YouTube video to help with inoculating!
Step 1: Preparing Your Bags
-
Unbox immediately upon arrival and remove rubber bands
-
Expect 5-10% burst grains on outside - this is normal.
-
Loosen gussets for airflow and stand bags up.
-
Let rest for 7-10 days before use.
-
If issues arise, contact us with video and unused port.
Step 2: Inoculation Process
-
Sanitize injection port.
-
Inject 2-10 cc/ml liquid culture (no spore syringes).
-
Sterilize needle between injections with mini torch.
-
Massage bag to distribute inoculant.
-
Ensure bag is filled with air and sealed.
Step 3: Storage
-
Keep at 72-78°F in open-air environment.
-
Avoid using incubators, seedling mats, or tubs, as these devices can easily overheat or dry out your grain, potentially harming or killing your mycelium. Instead, store your culture at room temperature, ideally between 70–75°F.
Step 4: Monitoring
-
Expect growth in 7-14 days.
-
At 30% growth, gently mix to distribute mycelium.
Step 5: Final Steps
-
After 100% colonization, wait one week before spawning.
Step 6: Choose Your Substrate Method
Once your grain is fully colonized, you have two excellent options for spawning. Simply click your preferred method below:
- Fruiting Bags: We offer easy-to-use 2-pound and 3-pound fruiting bags that require minimal prep. For our 2-pound bags, mix in about 1 pound of grain spawn; for our 3-pound bags, use approximately 1.5 pounds. Click here to order.
- Mono Tub: Our recommended mono tub is the Sterilite 54 Qt Gasket Box, ideal for fruiting. We suggest using a ratio of 2-3 x 3-pound bags with 10 pounds of our aPlusRabbit substrate. Click Here to order.
Important Notice:
To ensure sterility, we recommend following our storage guidelines: place bags on a clean shelf for 7-10 days, avoiding storage in shipping boxes or sealed containers. This allows for proper observation of the bags' condition.We stand behind our products with a comprehensive 60-day replacement policy from the date of purchase. If you encounter any issues prior to inoculation, we offer a 100% replacement guarantee. Simply send us a video documenting the problem, along with a clear view of the unused injection port.Please note that once bags have been inoculated with an external culture, we cannot offer replacements or refunds. To maximize success, we strongly advise verifying cultures on agar before use and adhering to strict sterile inoculation practices. By following these guidelines, you'll be well-positioned to achieve optimal results with our supplies. Your satisfaction and success are our top priorities


